
 The following methods require a small torch to solder.
Attaching polymer clay to metal is not as simple as using glue or poking a wire into polymer. Not if you want them to stay together, anyway. Following is an two-part exploration of methods, some which were suggested by friends. Some methods worked, some didn’t.
1. Embed a bent wire in polymer, thread it through a hole in the metal and melt the end of the wire coming through the back into a ball
I tried this with fine silver wire, tin wire (aka solder) and argentium wire. Argentium and gold has less heat conductivity, but a higher melting temperature than tin.
The difficulty is that the flame from the torch can reach 3,623˚F and polymer clay burns at 350˚F. In these tests, I used a Smith’s Little Torch with propane and oxygen and directed it sidewise at the wire, not down at the metal sheet.
There are different methods to try to protect the polymer from excessive heat. Some examples are: water, ice, wet paper towels, Chill Gel (or equivalent), or some some type of heat sink. Metal conducts heat, so my concern was that the embedded wire would heat up and burn the polymer.
I first tried melting bits of tin wire with a soldering iron. Tin melts at about 450˚F, which is a distinct advantage over fine silver, which melts at 1761˚F. I thought I could just touch the soldering iron to the tin wire and it would magically melt into a perfect ball.
 The reality was that it doesn’t create a nice ball consistently. More often than not, the melted solder becomes like frosting and sticks to the soldering iron. I tried melting the wire with a torch which made a big difference in the quality of the melted ball.
Then I tried fine silver wire, which normally melts quickly into a beautiful ball.
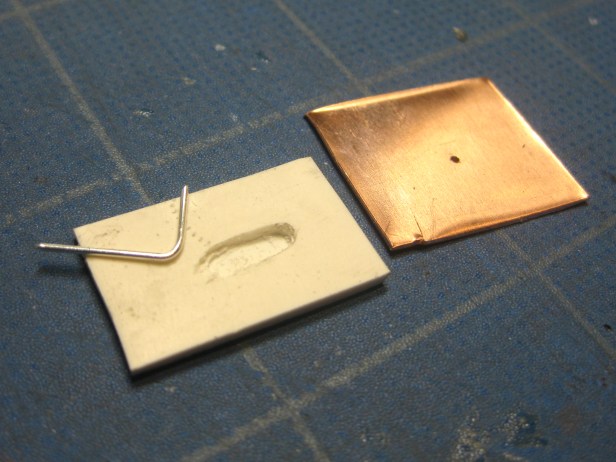 First, I routed out a recess in a baked Kato polymer tile using a flexshaft and an inverted cone bur. A ball bur would work, too.
I used Kato for all of these tests. It cures at 300˚F, the hottest of all polymer clays. It’s also one of the hardest polymer clays, so it seemed a good choice.
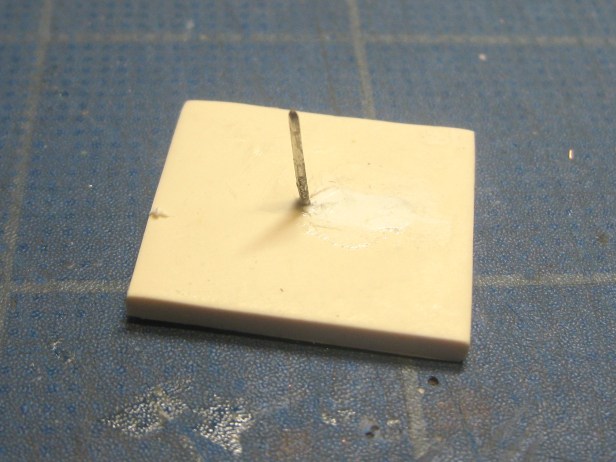
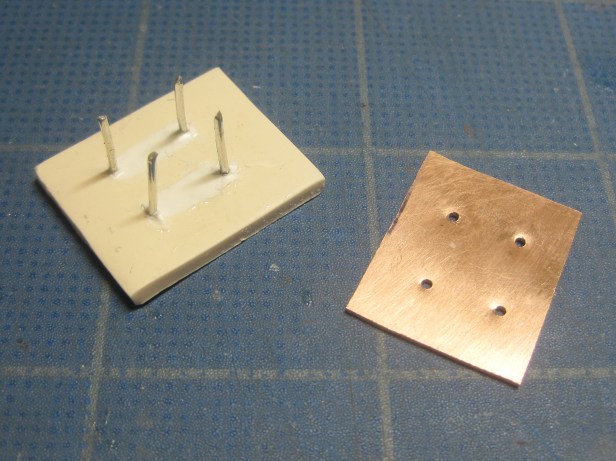
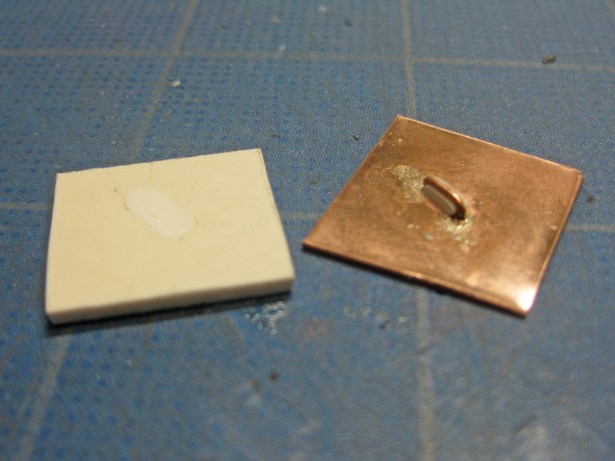
 I filled the recess with a bit of Kato liquid clay so the raw clay would stick to the baked clay, and then filled it up with raw Kato clay. As you can see in the photo above, if I simply press the wire into the raw polymer, it doesn’t get covered and will easily pull out.
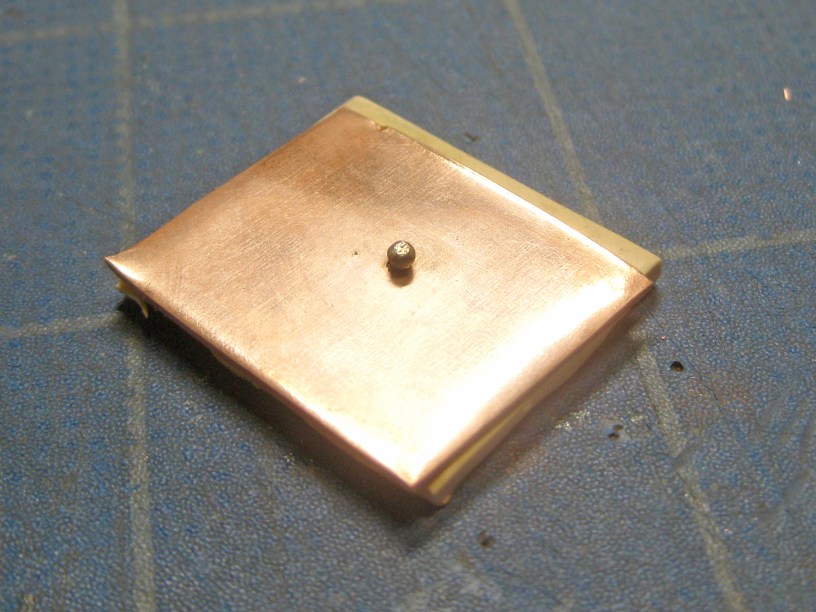
 In the photo above, the wire is properly covered with raw polymer. Next, I drilled a small hole in the copper sheet.
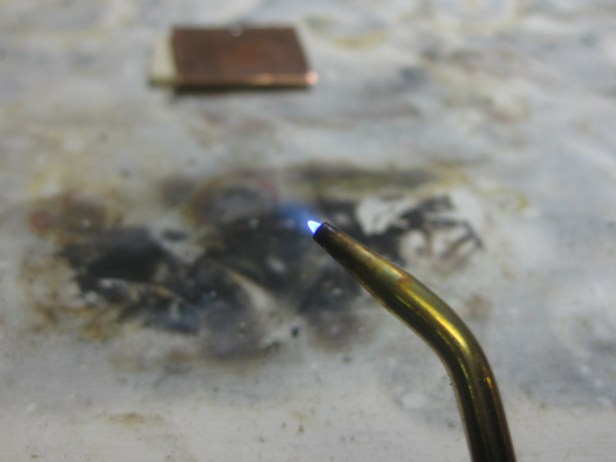
 After baking the wire into the polymer, I placed the copper sheet over the wire and tried to melt the fine silver wire with a torch. I thought I’d do this as a baseline test without any type of heat protection for the polymer.
 It did not go well. Within seconds, a wisp of smoke came out from under the copper sheet. There was more smoke, but I persisted. I could NOT get the fine silver wire hot enough to melt. I’ve melted balls on the ends of hundreds of pieces of fine silver wire and it should have been a breeze.
It was as though the polymer was acting as heat sink, sucking up the heat. I felt like I was trying to light a candle and instead of the wick lighting, the heat was transferred to the wax which melted and burned. The copper didn’t get any oxides on it from the torch and the flame became bushy, like it was burning something in the air, such as oil or gases escaping from the polymer.
Please note that I did this in the garage wearing a good fume and particle mask because I knew it could burn. It’s a really bad idea to breathe the fumes from burning polymer.
Argentium wire
Argentium conducts heat poorly, and it’s much cheaper than gold, so I that was my next test. This is 22 gauge wire.

The wire balled up quickly with the torch, but didn’t melt all the way down to the copper before smoke started to appear. I stopped because I thought the burning would only get worse. You can see the charring in the photo above.
Tin wire
 Next, I tried the tin wire (aka solder). It’s available lead-free in 18-22 gauge. I think the 20 gauge is a good width. The 18 gauge is too thick to easily bend into 90˚ corners. Twenty-two gauge would work for delicate pieces.

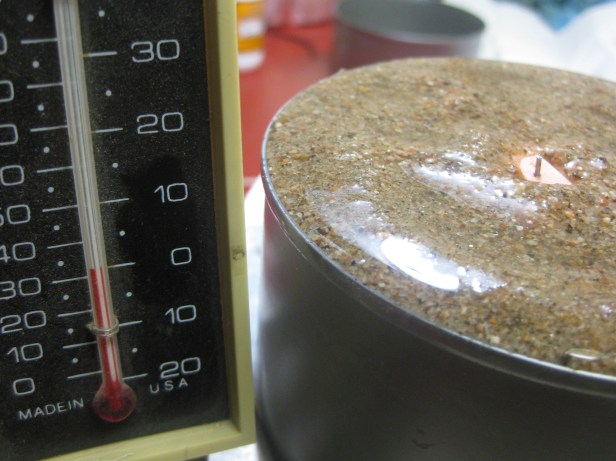
This time I buried my test piece in sand saturated with water and just left a little bit sticking out. It’s cold in my garage at the end of December, so it was like ice water.
The wire melted quickly and there was no damage the copper or polymer, but I had inadvertently gotten sand between the layers, so I misjudged the height and the ball ended up too high.
I cleaned out the sand and tried again. I had many problems with water sputtering and the wire not wanting to melt, so I cleaned it off and tried a third time, this time without the wet sand.
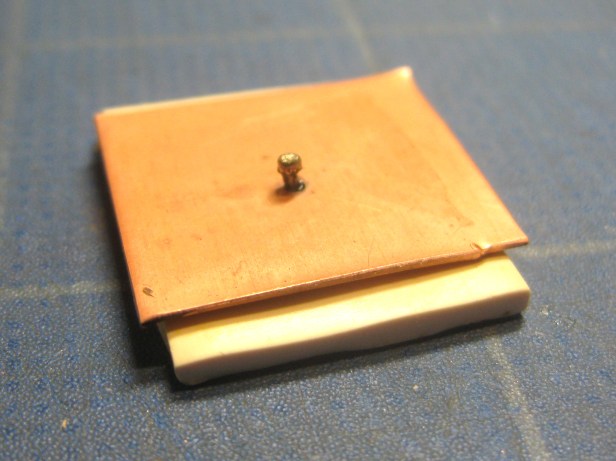
It worked well. No smoke, no burnt polymer and a fairly nice ball. I did have to clean off oxides on the copper created by the torch. I tried pulling this apart, and it holds quite well. A disadvantage is that tin is a soft metal, so it will mar easily.
More tin wire testing
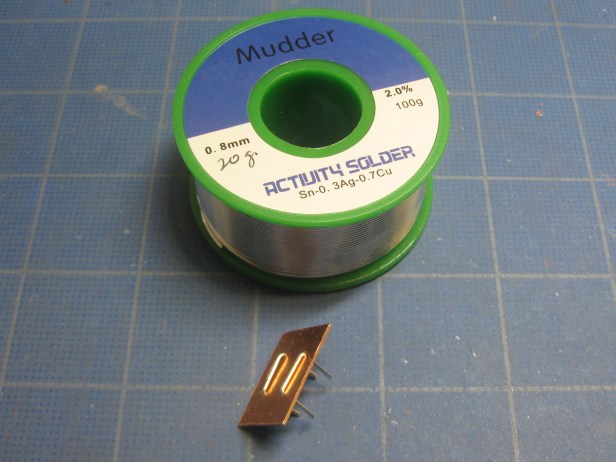
I liked this method so much I tried it with four wires sticking out instead of one. First, I drilled holes in the metal and bent two pieces of wire to fit through the holes.
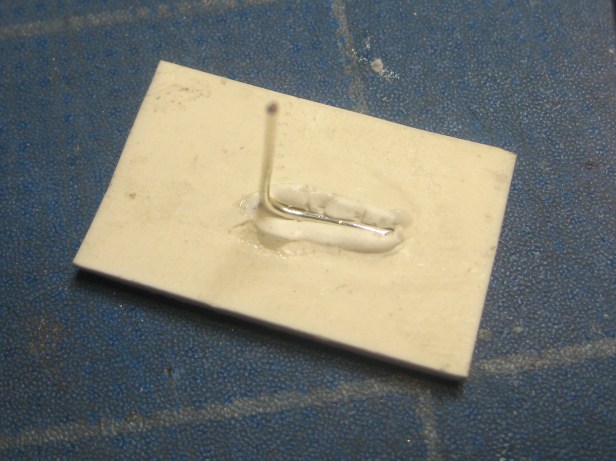
Then I embedded the two wires in channels I routed out of baked polymer and baked that.
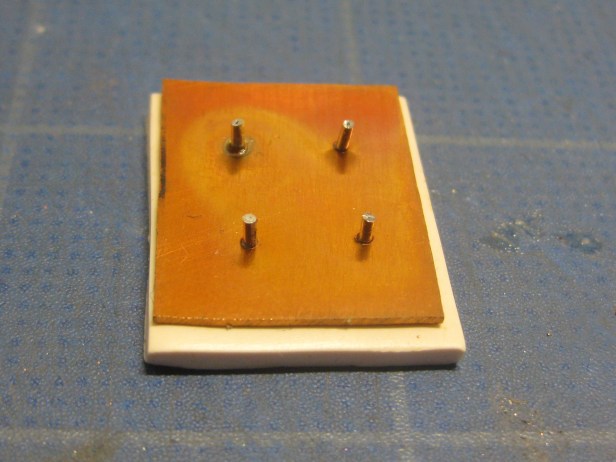
I assembled the two parts and trimmed the wires long enough to melt nice balls.
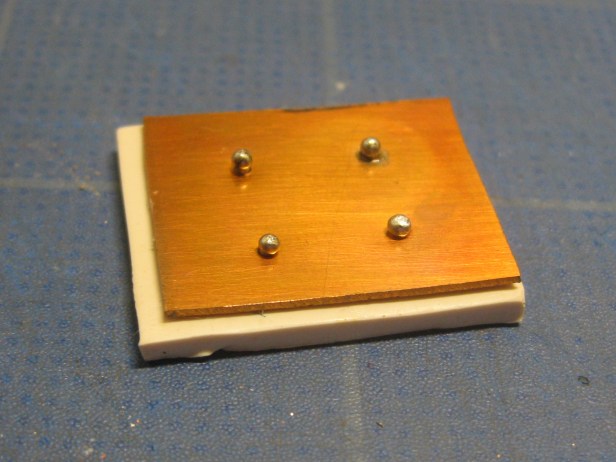
I didn’t bother putting it in anything to keep the polymer cool and it worked very well. The tin wire melted quickly and the polymer wasn’t affected. Yay!
2. Solder a bent wire to the copper sheet and press it into raw polymer
I’ve done something similar before to capture polymer and it works well. If your polymer layer isn’t very thick, your bent wire can’t be very high.
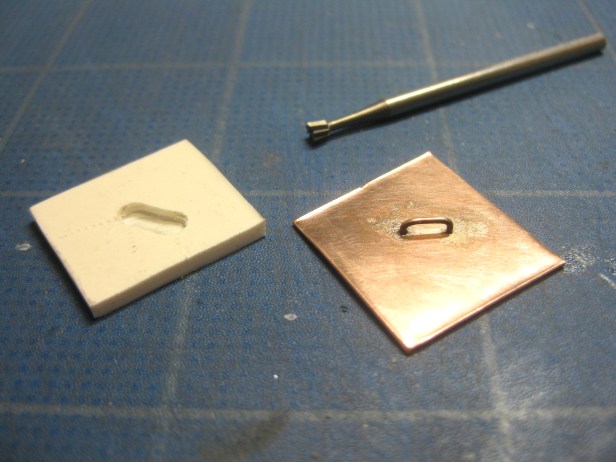 I routed out a recess in the baked polymer with the inverted cone bur shown above and soldered a little wire loop onto the copper.
 Next, I filled the recess in the baked clay with a thin layer of Kato liquid clay and some raw Kato clay.
I also filled in the hole between the wire and the copper sheet with raw Kato and trimmed it off leaving just a little hanging out on each side. You can barely see this, but it’s important because that’s what sticks to the polymer in the recess. Then, I pressed the metal wire into the filled recess and baked it.
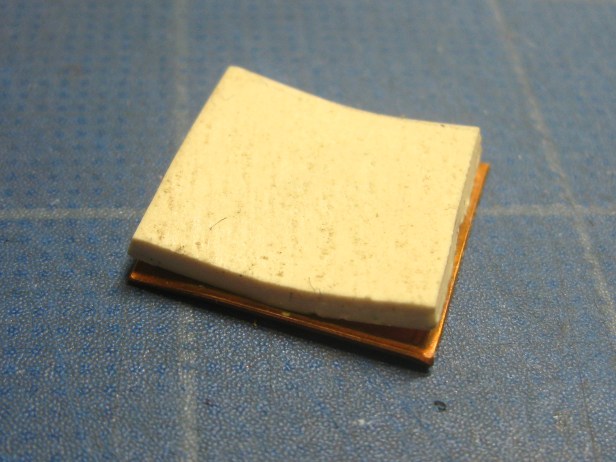 The polymer baked nice and flat. It looks bent because I tried to rip it off, but it didn’t want to budge.
3. Bezels and prongs
I shouldn’t forget the traditional methods of attaching things to metal. Bezels, partial bezels, partial bezels combined with prongs, just prongs or bezels with tabs all work with polymer. I’ll be exploring these more in the future.
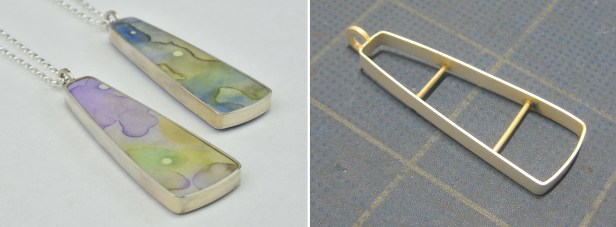
The bezel above doesn’t have a back and it’s not burnished over to capture the polymer. Instead, I soldered two wires inside the bezel and layered polymer above and below. No glue needed.

The bezels above have a closed-back. The one on the right has been burnished over. Please see my post Making Metal Bezels for Polymer Clay for more details.
A big thank you to everyone who contributed ideas and information toward finding solutions to this!
Click to read Attaching Polymer Clay to Metal–Part 2: Cold Connections

Thank you for sharing your tips! Specially loved the bezel with the wires inside, very clever:) Will put into use.
Greetings from a thankful reader in South America:)
LikeLike
Thank you! I hope it’s helpful.
LikeLike