

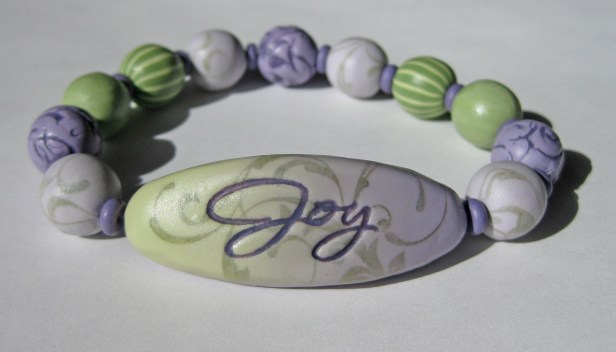
I had an idea for a lavender and green bracelet, but wasn’t sure how to make it. I knew I wanted a curved oval focal bead with an inspirational word over scrollwork. I also wanted round beads with different patterns and colors.
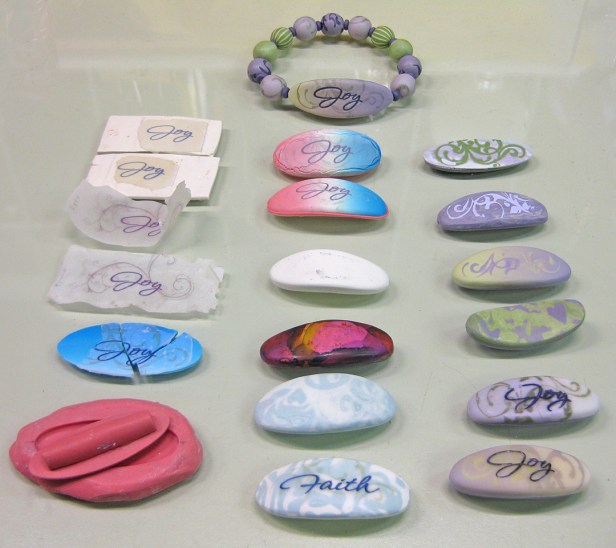
At the top of the photo above is the final bracelet. Below it are my failed attempts. I began my experiments with clay colors I didn’t think I’d ever use. The pink polymer clay mold I made is in the lower left corner.

First, I tried liquid clay transfers for the inspirational word, but they turned yellow. Then I made liquid clay “clings.” I put one on colored clay but it got bubbles under it, plus it wasn’t transparent. Then I cracked the clay after trying to curve it after it was baked.
After trying different mold-making products, I made a mold of polymer clay, created a curved bead and put a hole through it for stringing. It was tricky and a sweet success amidst failures.
I tried paper transfers for the word. One worked, the other cracked around the curved edges, maybe because I didn’t use it right away and the clay dried out.
I tried alcohol inks that were really pretty, but got darker when baked. I tried mokume gane, which was also beautiful, but unpredictable.
I set aside the idea of transfers and ordered rubber stamps of lettering and scrollwork.
I made a rubber stamped impression of scrollwork and backfilled it with clay. I stamped lettering on thin translucent clay and used it as an overlay. Nothing was quite what I’d envisioned.
I began to wonder if it was even possible to do what I wanted to do. After each attempt I’d do more research. In the process I learned a lot, but it was frustrating. I joked that instead of “Joy” it should say, “Blood, Sweat & Tears.”
The focal bead started out big and thick. My first drafts seem to start out clumsy, then I refine them to be smaller and thinner.
Finally, it came to me how to do it and I made a bracelet I’m happy with and can reliably reproduce. It’s a Skinner blend that’s rubber stamped with scrollwork. The lettering is pressed into the clay and filled with acrylic paint after baking. The beads are covered with various veneers.
What I learned from this:
- Liquid clay can turn yellow when baked.
- Liquid clay “clings” can get bubbles under them. They may not be transparent and can pucker on curves. You also have to somehow deal with their edges.
- Don’t bend baked clay. It can break.
- There are many mold-making products and not all work with polymer clay.
- Transfers can crack when molded around tight curves.
- Alcohol inks can change color in the oven.
- If you want a precise image, use transfers, rubber stamps or silkscreens.
- Be aware of polymer clay pieces getting too big, thick and heavy.
- A process that works for someone else, may not work for you.
Going through this gave me great respect for polymer artists who’ve figured these things out. Maybe someday I’ll learn what I did wrong with the techniques I abandoned. Some of them I’ll try again on other projects.
Transfers and mold-making will probably be future posts. I have several different products and would like to know what works best.

I’m so glad I found you on Pinterest. I so appreciate all your insights and pointers!
LikeLike
Thanks, Karen! I appreciate it.
LikeLike