

When I make a mold, I want a good reproduction without bubbles or flaws. I want a back that’s flat so I can cut off the excess polymer clay with a tissue blade and sides that mold completely to the object and join sharply and cleanly to the back. I don’t want to clean up or fix the polymer I bake in it, if possible.
Usually the best way to do this is with two-part silicone mold-making liquid. With this, the detail should be really good, the back should be flat and the sides should butt up cleanly to it. You need to adhere your object to a flat surface so there are no gaps and create a container to hold the liquid. The disadvantage is that it takes many hours to cure. Using liquid silicone doesn’t guarantee you won’t have bubbles or air pockets in your mold, but it’s much easier to avoid them.
I wanted to find a faster way and two-part silicone putty alone isn’t it. When you try to push silicone putty around an object and make the back flat, the putty keeps moving around. You push in one area and another area pulls away from your object. Air bubbles can get trapped in the process and you’re not aware of them until it’s too late. The working time is so minimal with most putties that you don’t have time to get it right.
This test uses brush-on liquid silicone, specifically Rebound 25 made by Smooth-On as well as two-part silicone mold putty. My favorite putty by Make Your Own Molds is no longer available. I’m looking for one with a working time longer than 3 minutes.
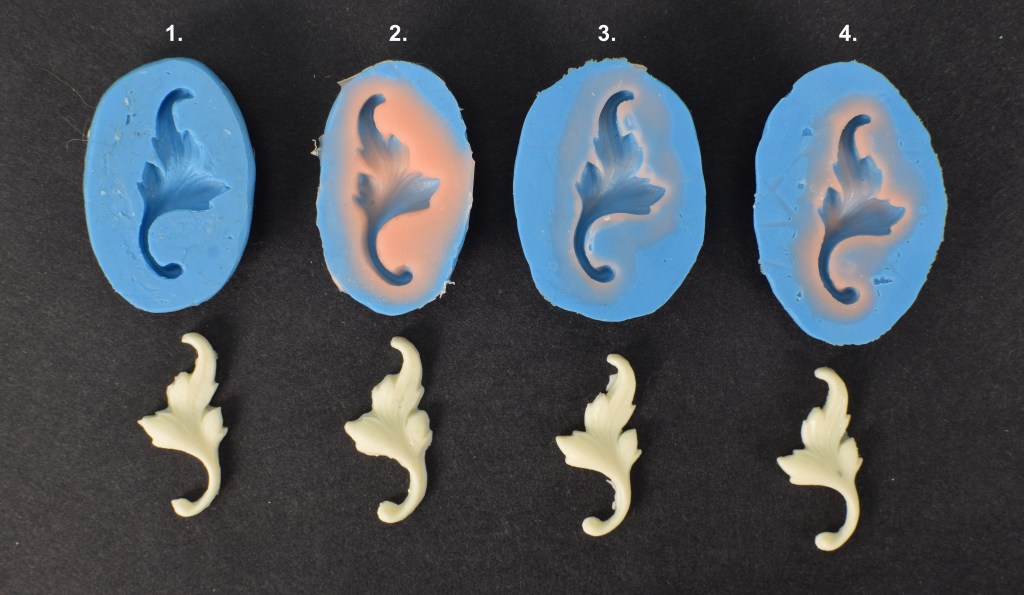
Below are my tests. The fourth was a success. The leaves were baked in the molds.
The photo below shows a better view of the excess polymer that would have to be removed.

Here are my test results and the learning I acquired in the process.
- The first test on the left uses only two-part silicone mold putty. There are tiny bubbles in the front of the leaf and it doesn’t have a clean edge where the sides join the back. This means a lot of clean up with an Xacto blade and sandpaper.
- The second one I painted with liquid silicone. After it set up, I covered it in two-part mold putty. The problem was I painted the liquid silicone on too thickly and there was a fairly large bubble that I didn’t see. Another problem was that I super-glued the original leaf to glass and the silicone pulled away from the glue so the edges between the sides and back are rounded rather than sharp.
- With the third try I attached the original baked leaf to a flat piece of polymer with liquid clay and baked it. Then I painted on a thin coat of silicone. After it set up, I covered it in two-part mold putty, BUT I didn’t get the putty into all the crevices and there are fairly large air bubbles in between the two putties. This means there are soft spots in the mold that can deform when you push the polymer into it. Where it was soft is where flanges of excess clay showed up.
- The last try was the best. I painted on a thin coat of silicone. After it set up, I took half of the quantity of two-part putty I had mixed and used a ball stylus tool to push it into all crevices. I then covered that with the remaining putty. It has no bubbles and the edges are almost perfectly clean so I can make reproductions with very little extra work to clean them up.
To make the original leaf, I pressed polymer into a metal die from Potter USA in the photo below, then carefully flattened and trimmed it. These dies are made for forming metal.

Below is the original polymer leaf attached to flat sheet of polymer with liquid clay.
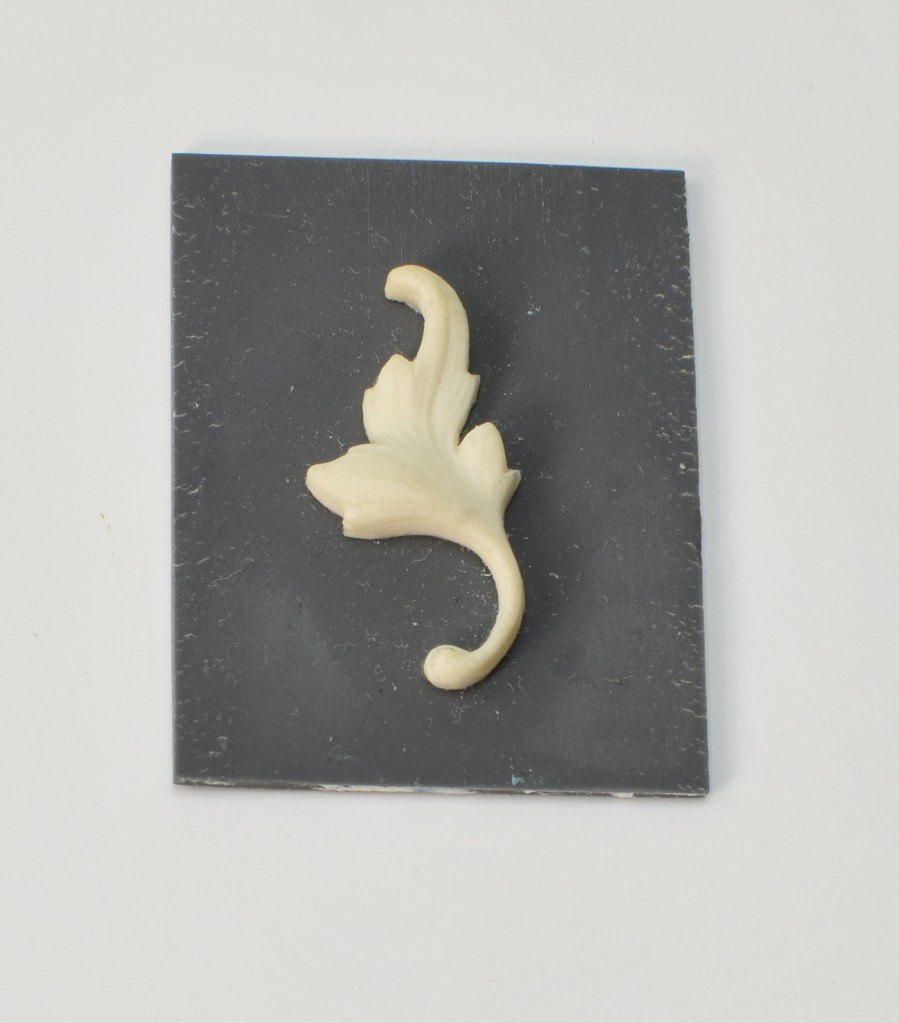
The object you’re molding needs to be sanded flat on the back so it makes good contact all around with the backing sheet of polymer. It’s important to create a good seal so silicone can’t seep underneath. Only use a thin layer of liquid clay to adhere it. If it gushes out, clean it up before baking. The goal is to have a clean, sharp edge between the object and the backing or you’ll have cleanup to do.

great info, Phyllis! Thanks!
LikeLike
Thanks, Gillian!
LikeLike
So really, the key is diligent and careful mold creation. I like the idea of doing it in stages, taking care with each layer. And my goodness…bubbles are such a frustration here, too! So sneaky.
LikeLike