


Plaquing is basically flat bubbles in the clay which can cause bulges on the surface. I differentiate them from tiny round bubbles, though neither are desirable. Plaques look pretty bad unless you’re trying to make faux granite or jade.
I thought I’d test plaquing, but also ended up testing yellowing and breaking.
WHAT CAUSES PLAQUING?
I’ve read plaquing can come from humidity or moisture on your hands getting into the clay. I’ve also read it’s from air introduced when conditioning the clay, or gases in the clay expanding when baked. I always wear nitrile gloves when working with polymer clay and I live in a dry climate, so I lean toward the air or gas theory.
TESTING METHODS
In this test, I used translucent clays to more easily see the plaquing. Plaquing happens in colored clays, too. You just have to look harder to see it.
I made the swatches of each brand from the same block of clay. All were two millimeters thick, except the thin swatches which are called out. They were one millimeter thick.
I experimented with different oven temperatures, baking durations, methods of baking and methods of conditioning.
When the swatches were cool, I tried to break them by bending them until the short ends met. Those in the photos above didn’t break.
All clays were purchased within the last year. Cernit was quite soft. Kato and Fimo were firm–a bit firmer than Premo. Pardo was hard and crumbly. Months ago, I tried conditioning Pardo with just the pasta machine and it got a lot of bubbles in it. This time, I hand-conditioned it before just flattening it in the pasta machine. All others were machine-conditioned.
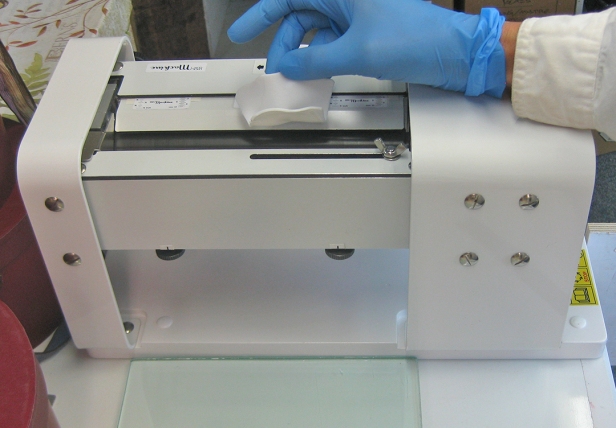
To machine-condition, I folded the sheet of clay in half and put the folded side first into the pasta machine about 20 times.
My process was to make one or two swatches and bake them. If they didn’t work out, I’d gather the scraps and run them through the pasta machine. If I didn’t have enough, I’d add new clay to the scraps and recondition it.
If you hold raw translucent clay up to the light, you can sometimes see the air bubbles, slice them and press the air out. I didn’t do this. I know I introduced some air, but I think there are other factors involved.
I live at 85oo feet which means I may need to increase temperatures and/or bake times. If you live at a lower elevation, the temperatures I’ve used may be too high for you.
WHAT DIDN’T WORK
In the photos below are the swatches that broke because they weren’t baked hot enough or long enough. Some broke as easily as potato chips. The next to bottom row is unconditioned clay. The very bottom row is thin swatches –one millimeter thick. All the rest are two millimeters thick.


BAKING UNCONDITIONED CLAY
When baked for 15 minutes, none of the unconditioned clays had plaquing, as shown in the photos above. When baked for 35-45 minutes, big plaques appeared in Kato and tiny bubbles in Pardo. This seems to indicate expanding gases. (See photo below.) There were no plaques in Premo, Cernit or Fimo. I expected plaques in Fimo, so that was puzzling. I don’t recommend using unconditioned clay, except for test purposes.

CONDITIONING METHODS REVISITED
Since I created some of the plaques by introducing air when conditioning, I wondered how I could improve. I suspected that scraps randomly layered together created pockets of air. I did a new test with Fimo and Cernit using the following methods:
- hand-conditioning
- machine-conditioning with the fold down
- machine-conditioning with the fold sideways
- machine-conditioning with the fold diagonal
- machine-conditioned scraps
- food processor conditioning
All conditioning started from fresh clay, except the scrap method.
I really tried to have the folded clay not touch, except for the fold at the very bottom. Letting it gradually close on its own as it runs through the machine seems like it would trap less air than sealing it together by hand. See photo below.


With Cernit, machine-conditioning did really well (#2, #3 and #4). The idea of layered scraps trapping pockets of air seems unfounded (#5). Hand-conditioning (#1) and food processor conditioning (#6) caused noticeably more plaquing. The food processor swatch is filled with thousands more tiny bubbles than the others.
With Fimo, none fared well. The food processor method (#6) seems the worst. The swatch that was machine-conditioned on the diagonal (#4) might be a tad better.
I go into more detail with conditioning in this new post.
CONCLUSIONS
Each clay reacted differently. Some brands of clays were almost plaque-free while others plaqued a lot.
It seems there’s a very limited range of baking times, temperatures and methods in which to cure translucent clays for the best results. Following are the lowest temperatures and baking times that I tried where the swatch didn’t break and there was the least yellowing, though there was still plaquing:
Pardo: 248˚ for 30 minutes under tin foil in a preheated oven.
Premo: 275˚ for 10 minutes in a baking box with a preheated oven.
Cernit: 265˚ for 10 minutes in a baking box with a preheated oven.
Kato: 300˚ for 10 minutes in a baking box with a preheated oven.
Fimo: 265˚ for 10 minutes in a baking box with a preheated oven.
(A baking box is two cheap, aluminum baking pans with one inverted as a lid and two small ceramic tiles placed inside.)
Pardo was nearly transparent and plaque-free when hand-conditioned. It had a few little bubbles. It barely yellowed. A few plaques appeared after additional hand-conditioning. I didn’t test Pardo much because it did so well.
Premo was nearly plaque-free, but not as clear and it yellowed. It had a few little bubbles. It yellowed, but the raw clay is already yellowish. I didn’t test Premo much because it also did so well. Translucent Premo is much more flexible than white Premo.
Cernit had thousands of very tiny bubbles and some plaquing. It stayed quite white, regardless of baking duration. It started out with no plaquing, but plaques increased the more I reconditioned the clay.
Fimo I couldn’t find a way to cure without plaquing or breaking. It had a lot of smaller plaques. It stayed quite white when not over-baked. The longer it was baked, the more orange it became. At lower temperatures, the plaquing and color shift totally and magically disappeared, but unfortunately the clay also broke.
Kato I couldn’t find a way to cure without plaquing, breaking or yellowing. It had several large plaques which reduced in size, but increased in number, as baking was reduced. It yellowed quite a bit, but the raw clay is somewhat yellow. The plaquing disappeared and the yellowing was minimized on the one millimeter thin swatch baked at 265˚ for 15 minutes. This is 35˚ lower than recommended and it broke very easily. The longer Kato was baked, the stronger it got and the harder it was to bend.
What seems to reduce plaquing:
- Lower oven temperatures and less baking time
- Thinner sheets of clay
- Very careful conditioning
- Starting with fresh clay instead of reconditioning clay
If translucent clay is used as a very thin veneer, or where breaking isn’t a concern, then baking it for less time and at lower temperature will help avoid plaquing and yellowing.
I realize that starting with fresh clay isn’t practical. However, for projects where you really need to reduce plaquing, it did seem to help.
This test was a lot of work and I learned as I went along. If I were to do it again, I’d make all the swatches from fresh clay, rather than reusing scraps. I’d focus on the small range between breaking and not. I’d also use just the baking box, preheated with the lid off.
If someone knows how to better interpret the results, do a better job curing translucent clay, or condition clay without air bubbles, please tell me.
UPDATE: I figured out how to get Fimo and Kato to cure without plaquing, yellowing or breaking! Please see my new post Double-Baking to Avoid Plaquing in Polymer Clay.
P.S. I bought all these products myself and received nothing from the manufacturers.

O it is a treat. I m one year old clayer so it is very important for me to reads research of others. I m shifting from premo to kato.
I love to work with translucent and it is treasure to me.
LikeLike
If you like translucent, I’d suggest Pardo. It’s very clear. Be sure to condition it by hand.
LikeLiked by 1 person
Great article! I’m new with translucent clay…
What do you suggest I should use for this tutorial?
https://www.fimodiy.com/jewelry/translucent-polymer-clay-tutorial.html
Thanks,
LikeLike
The clearest translucent clays are Pardo and Cernit. Fimo would work, just refer to my blog post on double baking to avoid plaquing and yellowing: https://polymerclayjourney.com/2017/01/01/double-baking-to-avoid-plaquing-in-polymer-clay/
LikeLike